
General Remarks
Early on, we had a great meeting with our coach, Samir Patel. We talked about a lot of topics, including how to approach the project and how teams in the past have tackled problems surrounding building a functional hovercraft. What was truly helpful about this meeting is that Samir could tell us with confidence about how to design the skirt, which electrical components worked well for their PAC & LOBBYIST, where to get those components, and other important considerations. These tips saved us a lot of precious time. Our mechanical design process was quick, meaning that we noted improvements to be made at each step of the way and rapidly executed these improvements. We did this such that we would have a LOBBYIST to test on and have the next one in the works. Ultimately, this led to a hovercraft that was stable and robust.
|
|
Skirt
Final Material: Nylon
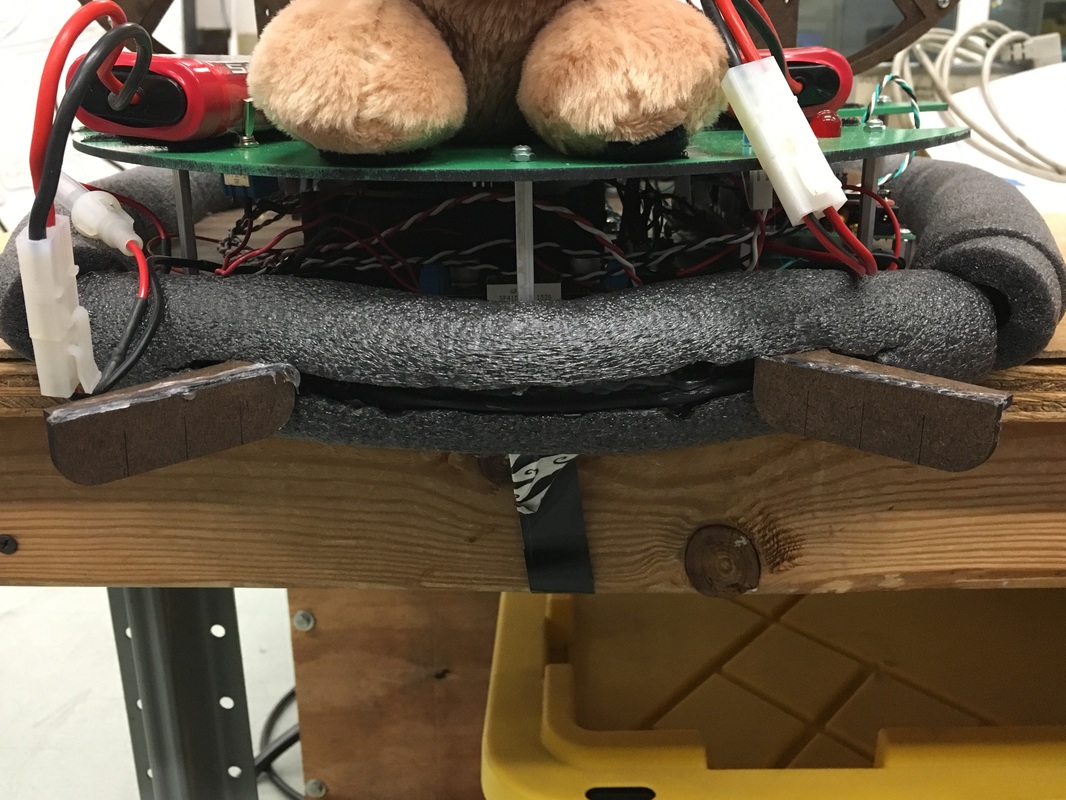
Keeping in mind that the hovercraft's ability to move would completely hinge on the skirt design, we prototyped this first. Luckily, our first prototypes lifted off of the ground and slid (nearly) frictionlessly across the floor of Room 36. We noted the best features of each design and synthesized to make a better one. To describe the skirt design process - we started with an "air hockey table" design, meaning that the bottom cavity of a foamcore hovercraft mule was covered with a taut piece of plastic and then punctured many times such that there was an even distribution of small holes across the bottom. The slid across the floor well when pushed, but we didn't feel that this was giving us enough of a 'cushion of air' under the hovercraft. With a small amount of weight added, the rigid frame of the hovercraft would contact the ground and bring the whole thing to a halt. Our next design (started only a bit after the first) also employed a taut sheet of plastic but had a large hole in the very center. Our hope was that the plastic would inflate under the hovercraft. Still, we didn't achieve the cushion. So, we tried the same idea, but with much more material. This worked! When we turned on the lift fan, the excess material bloated down and out to give us the skirt that we were looking for. From there, we worked on building a better chassis for the skirt to lift.
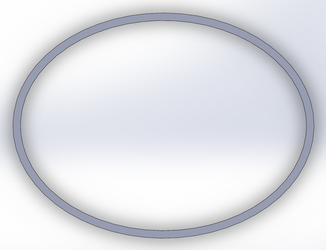
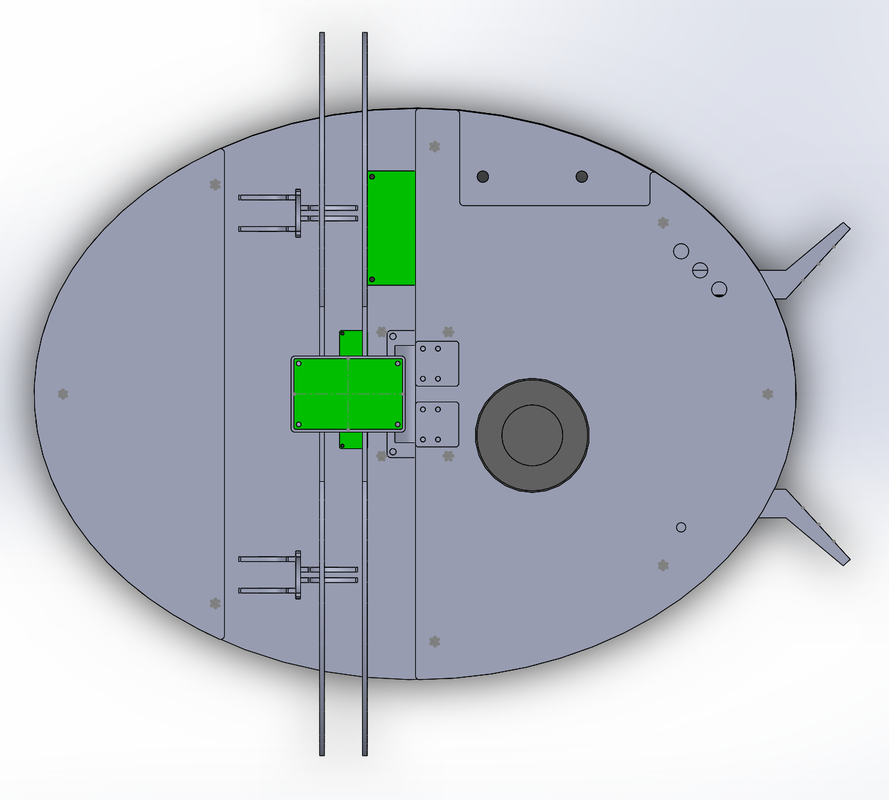
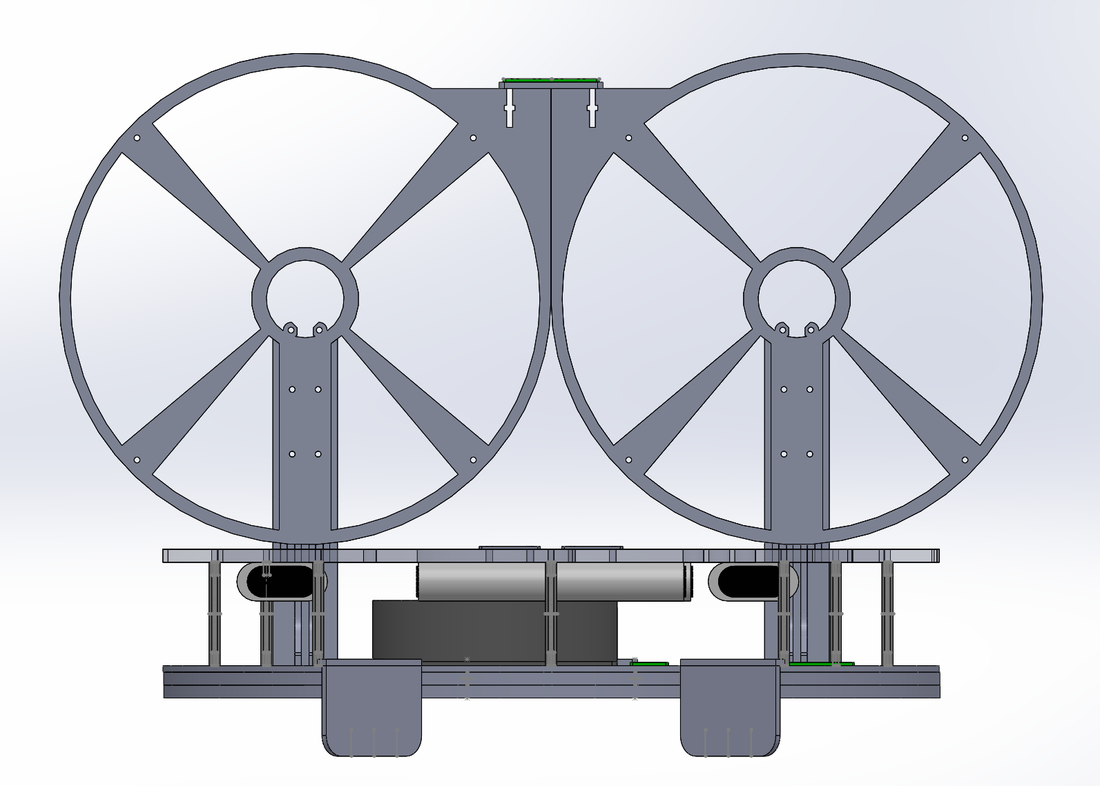
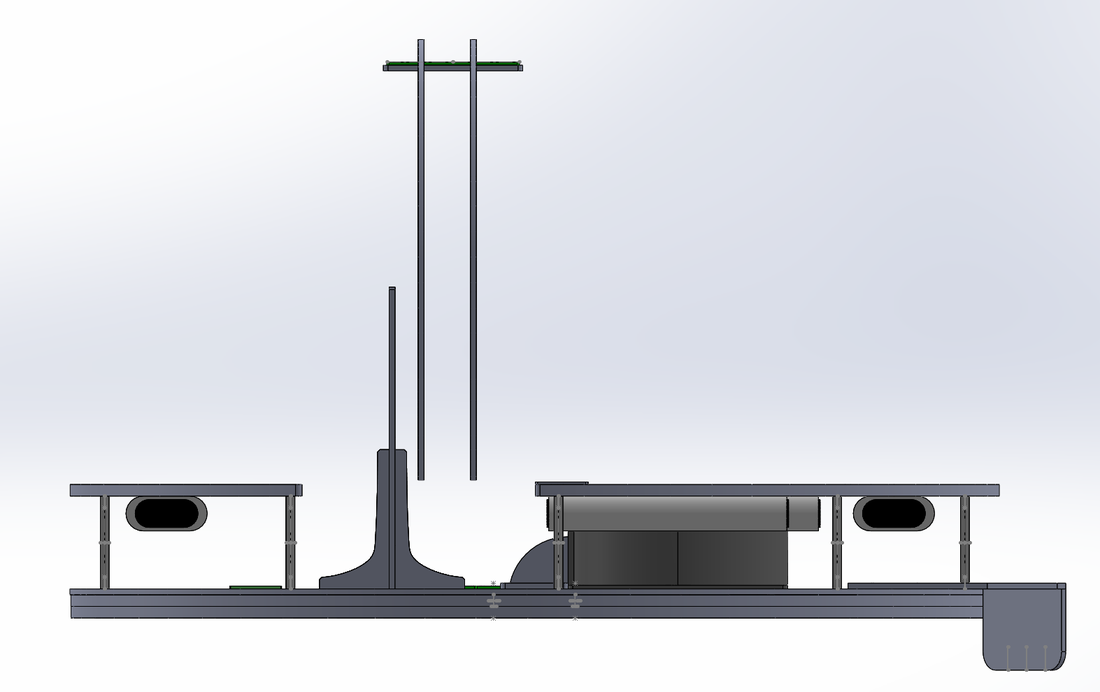
Chassis/Frame
Final Material: Duron/Masonite
Our first prototypes of the chassis were truly designed to quickly test different skirt designs. Once we found a decent skirt design, we went to overhaul the chassis. We first focused on the interface between the chassis and the skirt. It needed to not interfere with skirt inflation, be airtight, and look decent (at the time, we didn't know that our bumper would ultimately cover this interface). During the skirt iterations, we did happened upon a general chassis silhouette that persisted throughout the rest of the project - a simple ellipse. We took this silhouette and turned it into a perimeter ring that was 0.5" thick. This ring would let us sandwich the edges of the skirt material between the bottom of the chassis (whole ellipse) and the top of the perimeter ring. Hot glue, hot glue, hot glue - not always the best fastening method for a final product, but in this case, it allowed us to quickly seal air leaks in the interface and test immediately. We built a prototype that heavily resembled our final bot using this method and it worked very well. At this point, the skirt material was still plastic. Our meeting with Samir set our intentions on eventually using nylon. By the time we had a reliable test platform, we had started to test propellers for controlling motion of the hovercraft. The props were exposed for some time, so our next priority was to design prop cages to protect the blades and our fingers.
|
|
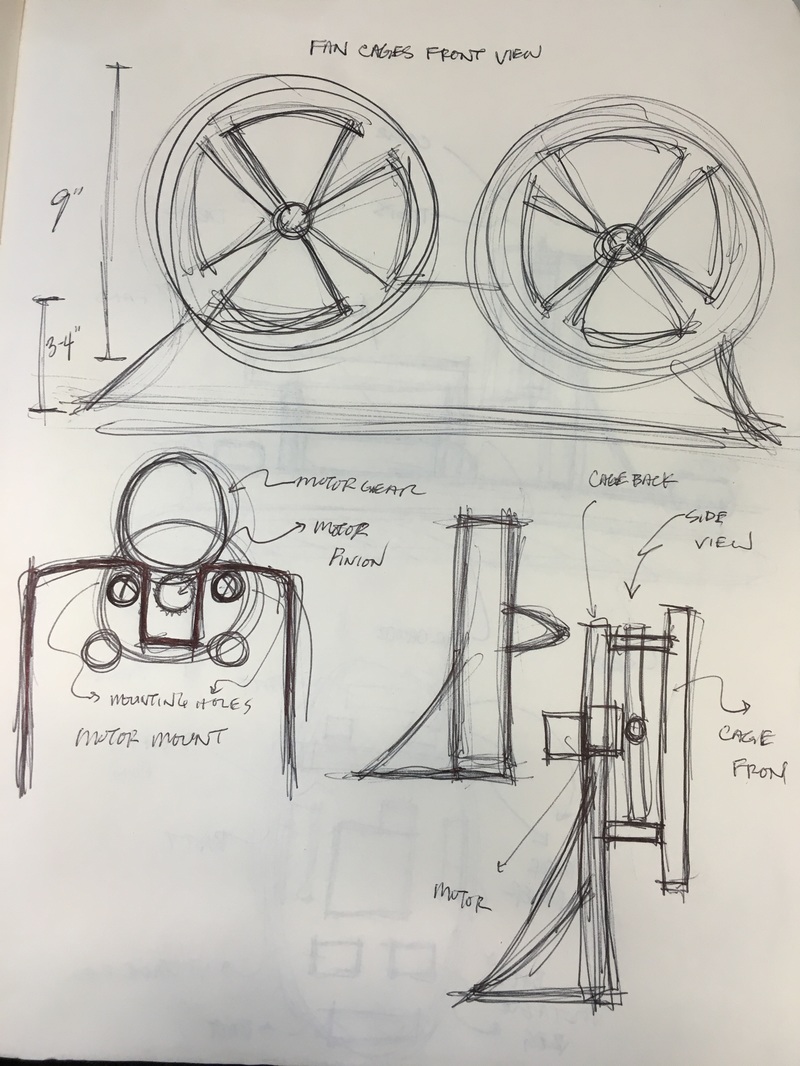
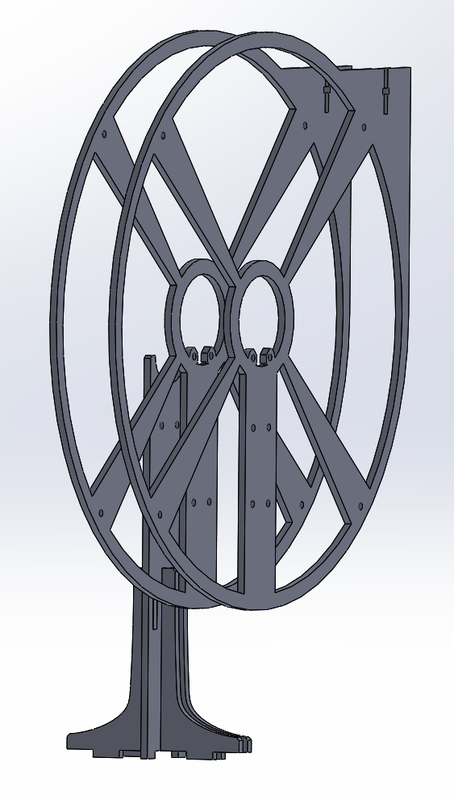
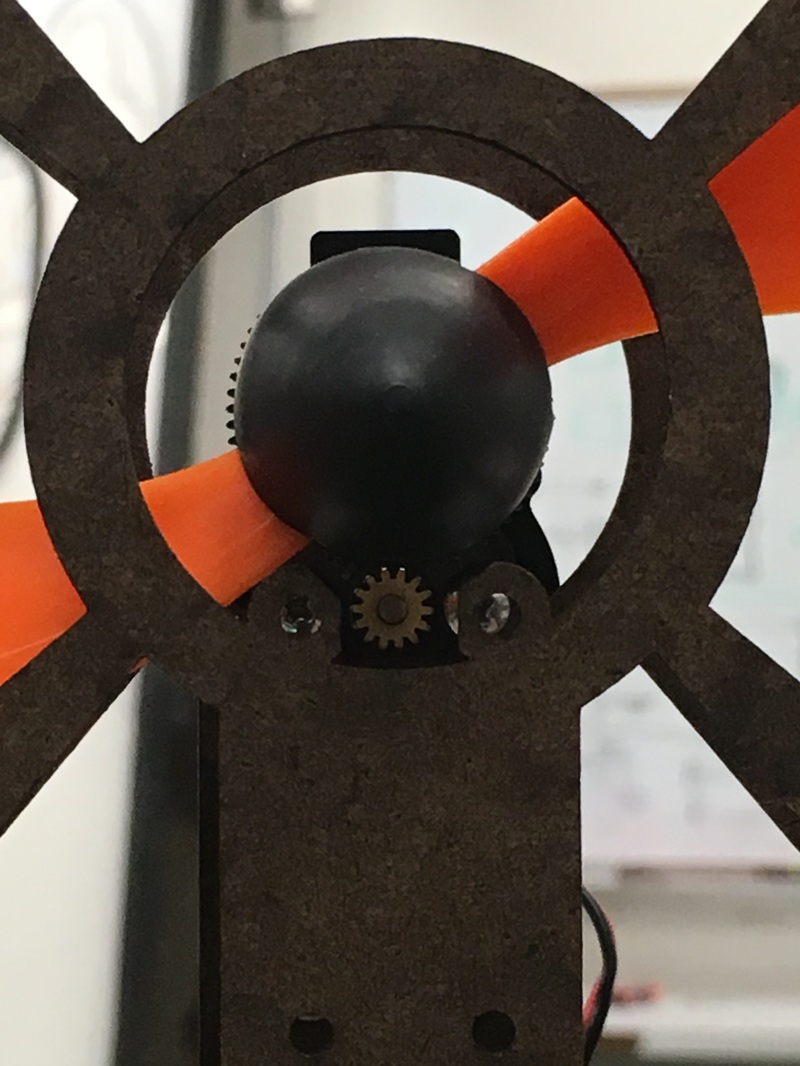
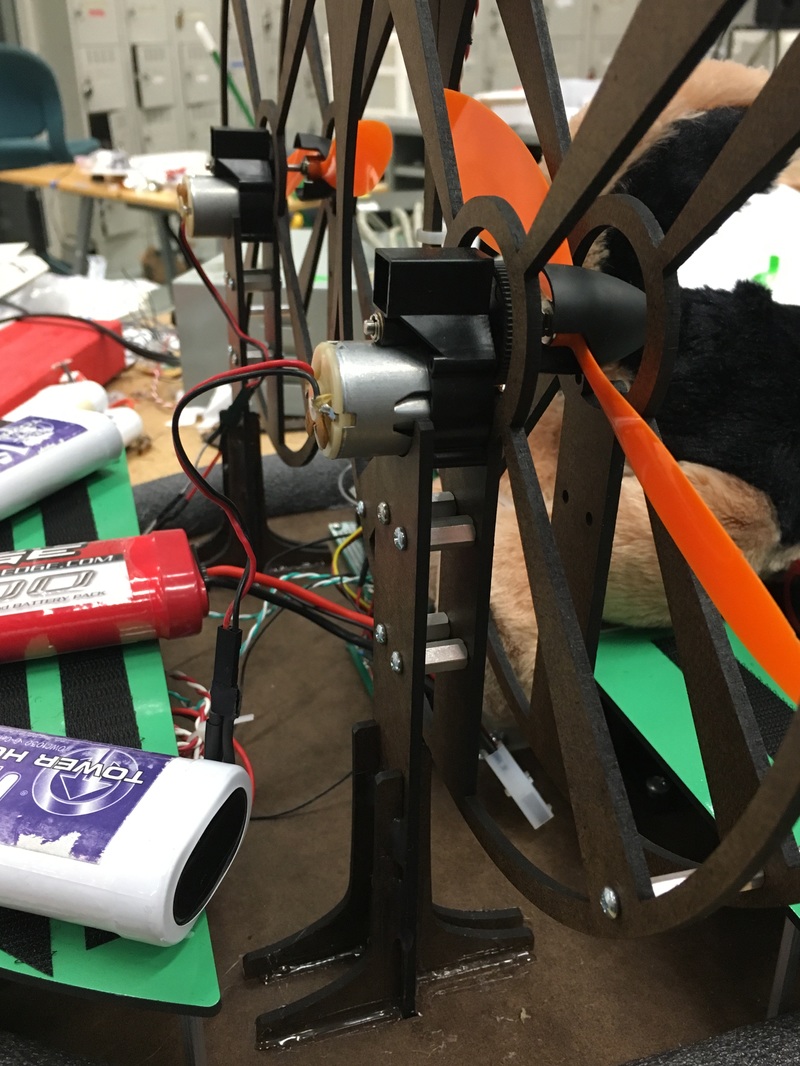
Propeller Cages
Final Material: Duron/Masonite
Important considerations for the prop cages: not impeding airflow, mounting the cages to the chassis in a smart way, and mounting the motors to the cages. Later on, where to mount the XBEE board would be another important consideration. Samir advised us to mount it high and away from motors and this is what we ultimately did. Our first prop cage iteration, however, had no XBEE mounting location. It purely guarded the props. The first iteration required some sanding because of how we decided to mount the motors. There was some contact between the motor pinion gear and duron on the mounting, so we took note and improved the next iteration of the cages. We also felt that the motor mount towers' gussets were too short (vertically). This issue led to too much travel of the prop cage assembly when powering the prop motor (the whole assembly would sway in the direction opposite of the prop's thrust). We made the gussets taller and the prop assemblies swayed significantly less. Our second iteration of prop cages had room for the motor pinion gear, provided sufficient airflow, and securely mounted the XBEE board at a very high point on the hovercraft. The XBEE mounting also mechanically coupled the prop cages for added stability. With our nearly-final chassis and finished prop cages, we moved on to designing a second layer of duron to give space for theme implementation and mounting LEDs/a switch. This would also hide the electronics that were mounted to the chassis.
|
|
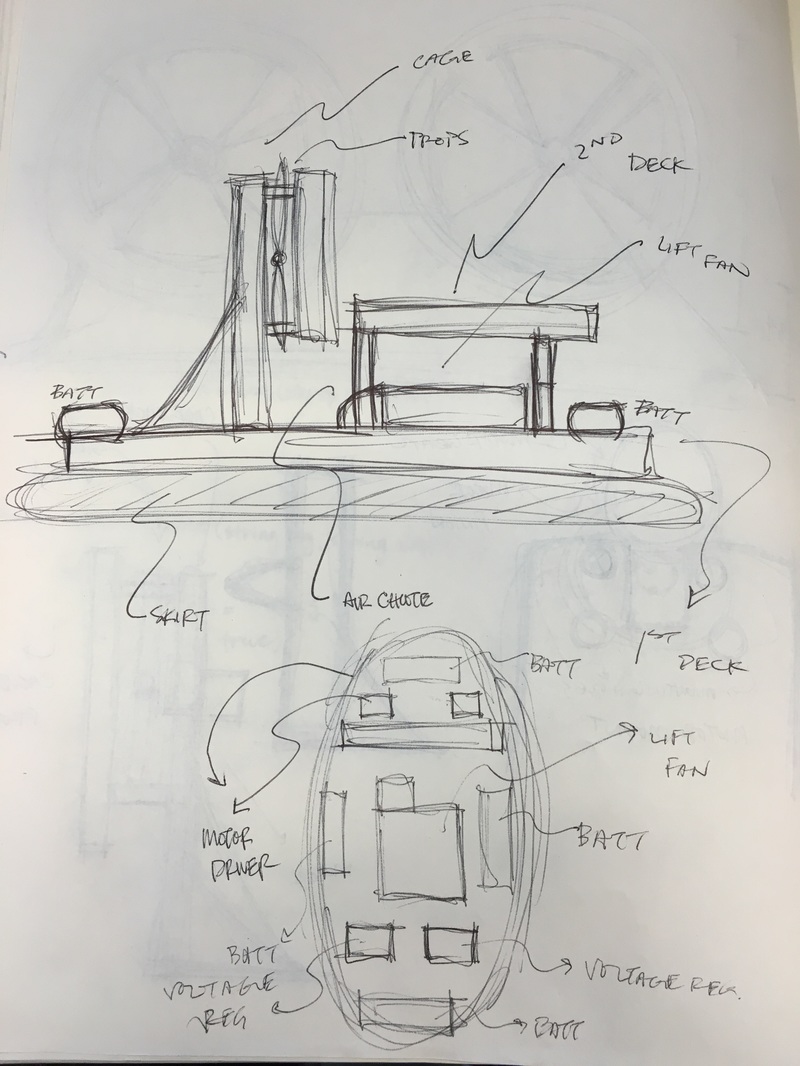
Second Tier + Arms + Air Deflector + Puppy
Final Material: Duron/Masonite
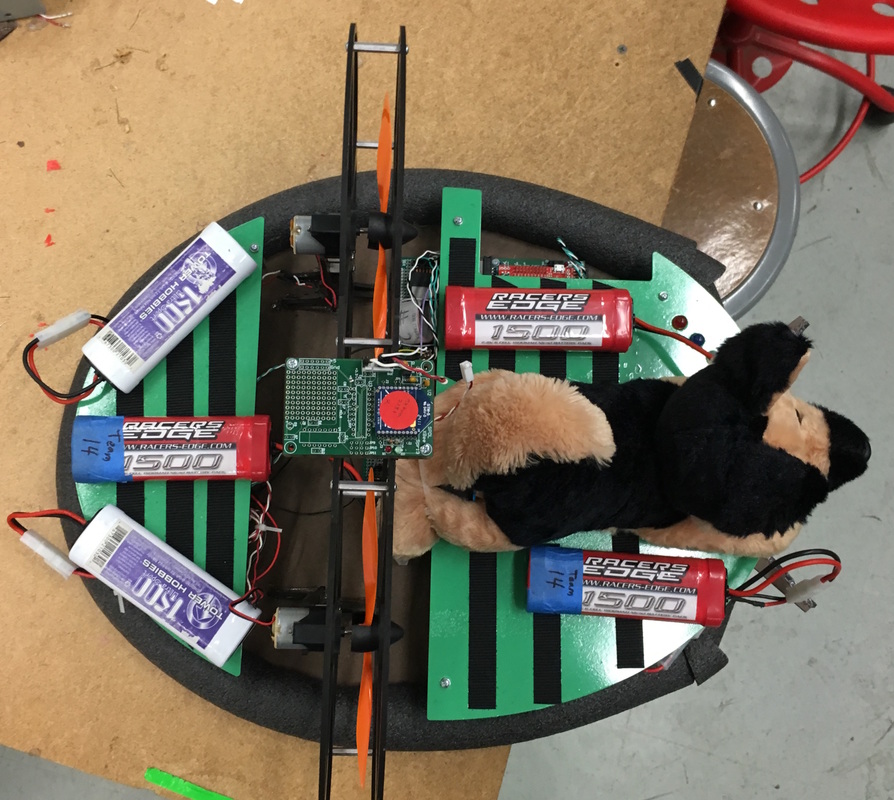
We focused on these items only after we had a solid base. This means that we could fully control the hovercraft (perhaps only with keyboard events at this point or a mixture of keyboard and PAC controls) and most of the functional design had reached a mature stage. The second tier comprised two separate decks (one for the front of the hovercraft, and one for the back) that were originally parts of the chassis design. We cut the part (in SW) where the props stick up and mounted the decks with 2" standoffs. On the front deck, there is a hole for the mandatory kill switch, holes for the team and time indication LEDs, and a mount for the looking-for-pair indication servo. The extra space provided by the second tier turned out to be advantageous as we attempted to fine-tune the weight distribution of the hovercraft. Batteries were, by far, the heaviest components on the hovercraft. Their placement on the hovercraft was paramount to being able to successfully navigate the bot. We used the extra space to lay down velcro and move the batteries around based on how the hovercraft was handling.
The arms on the front of the hovercraft were designed to gather the lawmakers (read: ping pong balls) that would be across the playing field. These arms were mounted to the bottom layer (aka the chassis) and protruded through the bumper that we would add to the hovercraft very last.
Another small addition that helped was a small duron board that was mounted via 0.25" standoffs below the hovercraft. That is, this board was mounted within the skirt. The purpose of the board was to deflect the rush of air from the lift fan out into the skirt, rather than down into the ground. We thought that something like this would be helpful as early as the skirt prototypes days, so we added it to the final iteration of the hovercraft.
Lastly, we had a puppy riding our bot to complement to 'Airbot' (Airbud - cute dog movie from our childhood) theme. The PAC controllers carried the theme through. The puppy's tail had a servo arm in it, which means that the tail wagged when the hovercraft was looking for a new PAC.
|
|